15 Jan 2024 |
nixos
The idea of a declartive reproducible operating system is really enticing. NixOs has been popping up in my reddit feeds recently. I had an option to install Nix as a package manager on my existing linux installation. But I decided to jump in the deep end. So, this post is being written on NixOS.
There is abundant documentation on Nix. Even after ignoring all of that, I was able to setup a working installation with most of my setup from the old Arch installation. Xmonad works. Firefox, telegram, zsh and neovim works too.
Setting up development environments is a bit tricky. It looks like there are different methods to set up isolated dev environments - nix shell, nix flakes, devenv etc. I got a flake based setup for python working. For android studio based android development, I had to install it globally. Flutter - there is no luck so far.
The next step is to learn the nix language and how the package management works.
14 Nov 2022 |
hacks
raspberry
pi
pico
Part1
Part2
Using the on-board LED to monitor sensor reads
The raspberry pi pico based temperature logger “hung” at times. It didn’t write anything to the file at all. But, it wasn’t obvious that it had stopped working. Initially, I had plans to turn on the on-board LED when writing to a file. But, more experienced programmers suggested that sensor_temp.read_u16() is more likely to be the blocking call. So turning on the LED before reading the sensor and turning it off after would give a clear indication. The LED will remain on if the call is blocked.
led = Pin(25, Pin.OUT)

def get_temperature():
    led.on()
    reading = sensor_temp.read_u16() * conversion_factor
    temperature = 27 - (reading - 0.706)/0.001721
    led.off()
    return temperature
Logging time along with temperature
It looks like the pico has a real time clock and can be accessed with machine.RTC(). When running the code using Thonny, it initializes the RTC with the current time. But when running outside of thonny, the RTC should get set to midnight of Jan 1, 2015. We’ll write the time along with the temperature to get a sense of when(/if) the pico fails to write to the file.
rtc=machine.RTC()
now = rtc.datetime()
file.write("{hh:02d}:{mm:02d}:{ss:02d}, {temperature:.2f}\n"
    .format(hh=now[4], mm=now[5], ss=now[6], temperature=temperature))
09 Nov 2022 |
hacks
TIL
gnuplot
raspberry
pi
pico
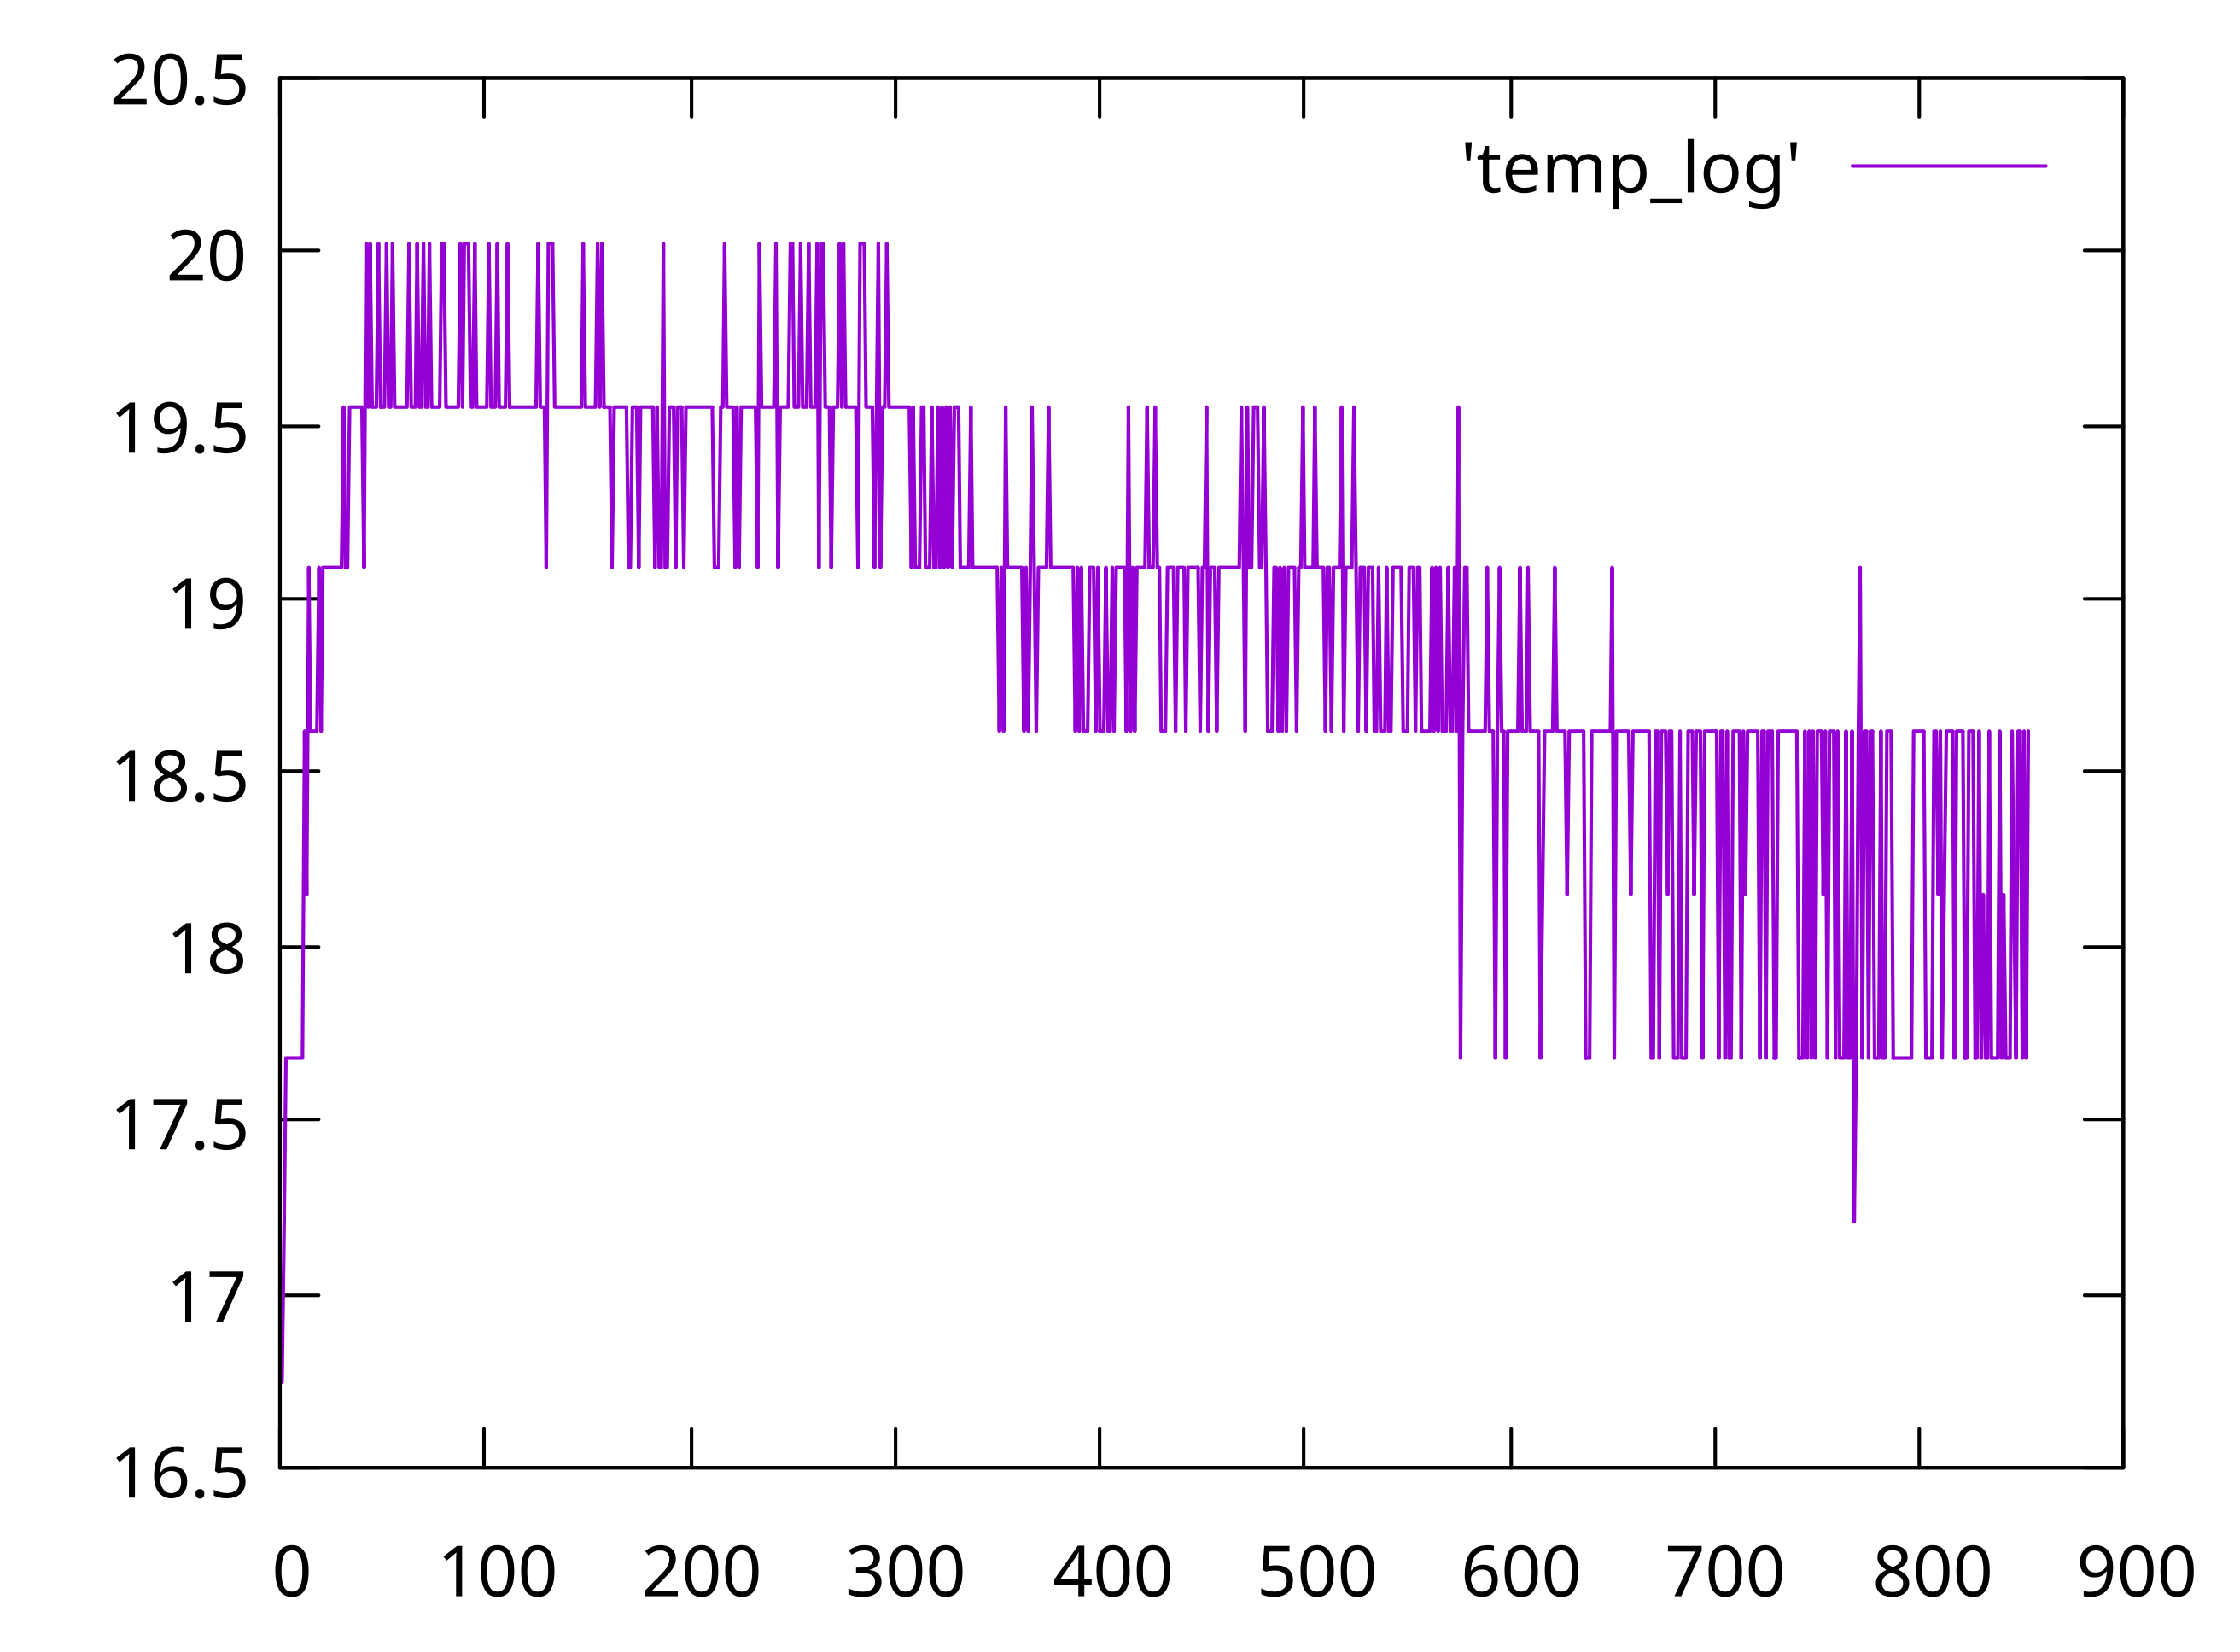
So, there was this raspberry pi contraption to log temperature to a file. The next step is to plot this in a graph. We get a single column file of recorded temperatures from the raspberry pi pico.
It is pretty easy to plot a graph from a two column file using gnuplot. If the filename is temp_log, all you need is:
plot 'temp_log' with lines
I was too lazy to find how to plot a single column file. The easy fix is to add another column with numbers. And that can be done easily with vim. You’d need to do the following keystrokes:
ctrl-v shift-g I 0 <space> <esc> - This will add a column of zeroes to the beginning

gv - This will reselect the column of zeroes

g ctrl-a - This will change the zeroes to an increasing sequence of numbers

Running gnuplot -persist plot.plt gets you the graph

Shower thought
- Boards like these don’t have a battery and can’t keep real clock time. I have never thought of that before. It would have been easy if we could log the time along with the temperature.
Next steps
- Blink an LED after writing to the file.
- Use
to_us_since_boot from the SDK while logging temperature.
06 Nov 2022 |
contemplation
hacks
TIL
We bought a new Air conditioner for the house. It doesn’t feel like the AC is able to regulate the temperature to what we set. But, humans are often wrong about these kind of things. A simple thermometer would have done the trick - but we need time-series temperature data to verify the AC function.
Enter - the Raspberry pi pico. It has a built-in ambient temperature sensor and supports micropython. It also has 2MB of storage. So, logging the temperature to a file should be easy.
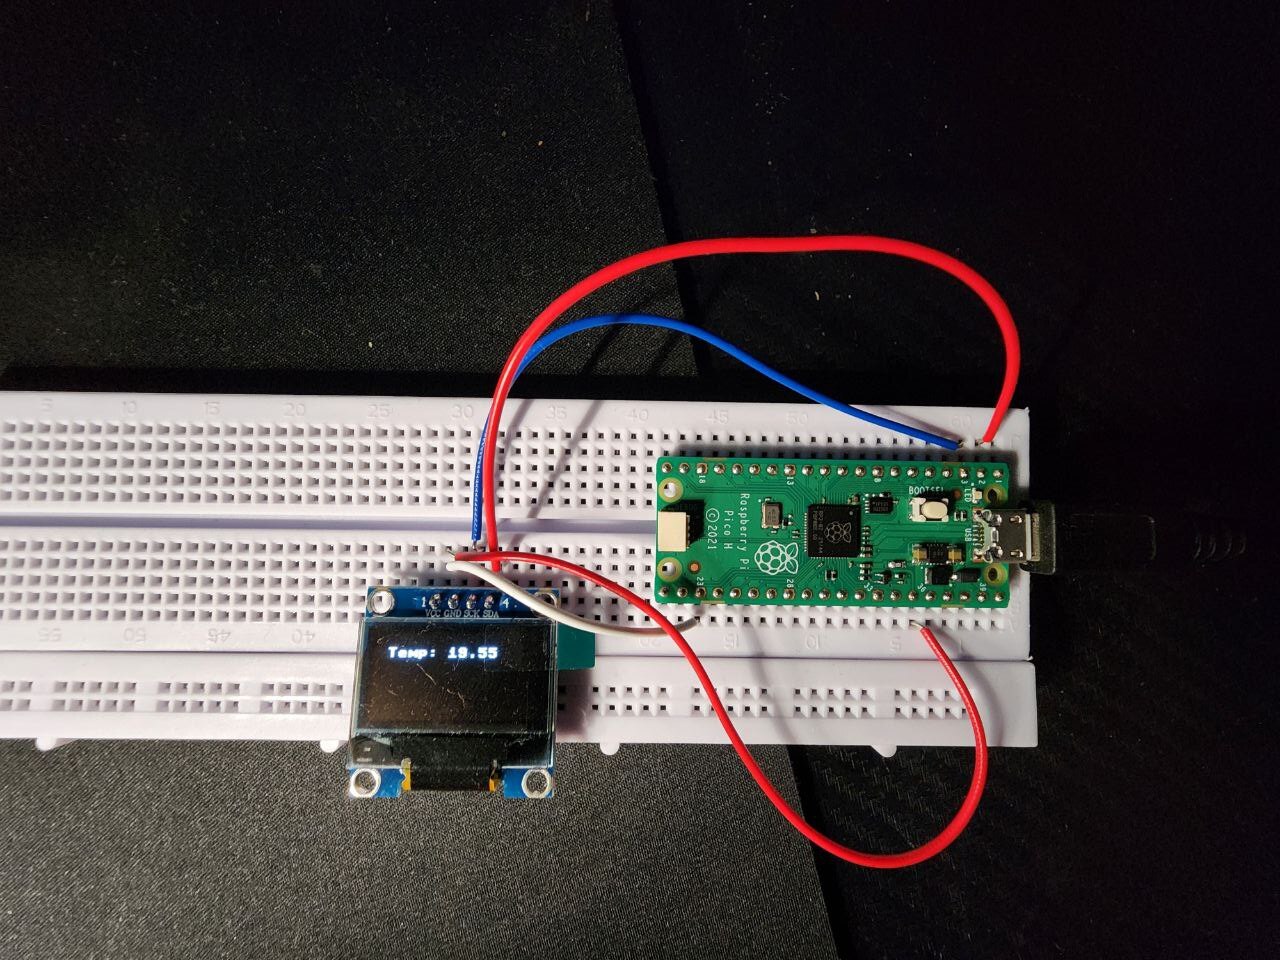
This is the “finished” project:

The OLED screen displays the latest temperature reading. Interfacing with the display was very easy. Tom’s hardware has a very good guide explaining this. Reading the temperature was trivial too.
The dirty code I put together looked like this
import machine
import utime
from machine import Pin, I2C
from ssd1306 import SSD1306_I2C

i2c=I2C(0,sda=Pin(0), scl=Pin(1), freq=400000)
oled = SSD1306_I2C(128, 64, i2c)

sensor_temp = machine.ADC(4)
conversion_factor = 3.3 / (65535)

file = open("temp_log.csv","a")

def get_temperature():
    reading = sensor_temp.read_u16() * conversion_factor
    temperature = 27 - (reading - 0.706)/0.001721
    return temperature

while True:
    temperature = get_temperature()
    print(temperature)
    oled.fill(0)
    oled.text("Temp: %.2f" % temperature, 10, 10)
    oled.show()
    file.write("%.2f\n" % temperature)
    file.flush()
    utime.sleep(20)
The code worked most of the time. But, there were instances when the temperature reading just wouldn’t change. Also, nothing was written to the file. Some debugging is required to find and fix the issue.
Random learnings
- If you name the file as
main.py, it will run when the pico is powered on.
"%0.2f" will convert a float to a string and round off to 2 decimal places.- A power bank is good enough to power the pico away from other power sources.
14 Jan 2021 |
neovim
plugin
lsp
In the last blog post, we saw how to setup the built-in lsp client in neovim for diagnostics and such. Now we’ll see how to setup autocomplete.
First, install completion-nvim. Add this to your vimrc and run PlugInstall.
Plug 'nvim-lua/completion-nvim'
Now, in the lsp_config.lua file, you need to make some changes. The file should look like this:
lspconfig = require'lspconfig'
completion_callback = require'completion'.on_attach

lspconfig.pyls.setup{on_attach=completion_callback}
lspconfig.tsserver.setup{on_attach=completion_callback}
lspconfig.rust_analyzer.setup{on_attach=completion_callback}
This should give you completion. Now, we need a trigger to activate completion. I like the tab key. The config for this is available in the repo.
" Use <Tab> and <S-Tab> to navigate through popup menu
inoremap <expr> <Tab>   pumvisible() ? "\<C-n>" : "\<Tab>"
inoremap <expr> <S-Tab> pumvisible() ? "\<C-p>" : "\<S-Tab>"

" Set completeopt to have a better completion experience
set completeopt=menuone,noinsert,noselect

" Avoid showing message extra message when using completion
set shortmess+=c

let g:completion_enable_auto_popup = 0
imap <tab> <Plug>(completion_smart_tab)
imap <s-tab> <Plug>(completion_smart_s_tab)
Now, you can use tab and shift + tab to navigate through suggestions.

